This tutorial step goes beyond the activation of an interactor (class/object, that modifies a data by user interaction) as shown in MITK Tutorial - Step 5: Interactively add points and shows what needs to be implemented to add a new way of interaction within your MITK application. Please see Interaction and Undo/Redo Concepts as an introduction to the MITK interaction mechanism.
The beginning of a new interaction is the idea or the feature request. To lighten things up, let's say, that we want to enable the user to move a surface by using the arrow keys. So a new interactor needs to be implemented, that will be associated to a surface (data of a data node) and on an arrow event modifies the geometry of the data to move it in virtual 3D world space.
We start with the definition of the state machine pattern to see what actions need to be implemented within the interactor.
  <!-- TutorialStep10Begin -->
  <stateMachine NAME="SelectAndMoveObjectWithArrowKeys">
    <state NAME="start" ID="1" START_STATE="TRUE" X_POS="3" Y_POS="40" WIDTH="100" HEIGHT="50">
      <transition NAME="CheckIfObjectIsPicked" NEXT_STATE_ID="2" EVENT_ID="1">
        <action ID="30" />
        <!-- 30 = AcCHECKELEMENT  -->
      </transition>
    </state>
    <state NAME="Guard_IsObjectPicked" ID="2" X_POS="282" Y_POS="23" WIDTH="126" HEIGHT="50">
      <transition NAME="yes" NEXT_STATE_ID="10" EVENT_ID="1004">
        <action ID="65" />
        <!-- AcSELECT  -->
        <action ID="1101" />
        <!--AcMODE_SELECT-->
      </transition>
      <transition NAME="no" NEXT_STATE_ID="1" EVENT_ID="1003">
        <action ID="75" />
        <!-- AcDESELECT  -->
        <action ID="1100" />
        <!--AcMODE_DESELECT-->
      </transition>
    </state>
    <state NAME="object selected" ID="10" X_POS="714" Y_POS="85" WIDTH="100" HEIGHT="50">
      <transition NAME="CheckIfObjectIsPicked" NEXT_STATE_ID="2" EVENT_ID="1">
        <action ID="30" />
        <!-- AcCHECKELEMENT  -->
      </transition>
      <transition NAME="z+" NEXT_STATE_ID="10" EVENT_ID="50">
        <action ID="92" >         <!-- AcMove  -->
          <intParameter NAME="DIRECTION_X" VALUE="0" />
          <intParameter NAME="DIRECTION_Y" VALUE="0" />
          <intParameter NAME="DIRECTION_Z" VALUE="1" />
        </action>
      </transition>
      <transition NAME="z-" NEXT_STATE_ID="10" EVENT_ID="51">
        <action ID="92" >        <!-- AcMove  -->
          <intParameter NAME="DIRECTION_X" VALUE="0" />
          <intParameter NAME="DIRECTION_Y" VALUE="0" />
          <intParameter NAME="DIRECTION_Z" VALUE="-1" />
        </action>
      </transition>
      <transition NAME="x+" NEXT_STATE_ID="10" EVENT_ID="52">
        <action ID="92" >        <!-- AcMove  -->
          <intParameter NAME="DIRECTION_X" VALUE="1" />
          <intParameter NAME="DIRECTION_Y" VALUE="0" />
          <intParameter NAME="DIRECTION_Z" VALUE="0" />
        </action>
      </transition>
      <transition NAME="x-" NEXT_STATE_ID="10" EVENT_ID="53">
        <action ID="92" >        <!-- AcMove  -->
          <intParameter NAME="DIRECTION_X" VALUE="-1" />
          <intParameter NAME="DIRECTION_Y" VALUE="0" />
          <intParameter NAME="DIRECTION_Z" VALUE="0" />
        </action>
      </transition>
          <transition NAME="y+" NEXT_STATE_ID="10" EVENT_ID="54">
        <action ID="92" >        <!-- AcMove  -->
          <intParameter NAME="DIRECTION_X" VALUE="0" />
          <intParameter NAME="DIRECTION_Y" VALUE="1" />
          <intParameter NAME="DIRECTION_Z" VALUE="0" />
        </action>
      </transition>
          <transition NAME="y-" NEXT_STATE_ID="10" EVENT_ID="55">
        <action ID="92" >        <!-- AcMove  -->
          <intParameter NAME="DIRECTION_X" VALUE="0" />
          <intParameter NAME="DIRECTION_Y" VALUE="-1" />
          <intParameter NAME="DIRECTION_Z" VALUE="0" />
        </action>
      </transition>
    </state>
  </stateMachine>
  <!-- TutorialStep10End -->
The pattern can be read like this:
AcCHECKELEMENT) is processed. AcCHECKELEMENT needs to check if the surface was hit by the mouse position (picking) and has to send the answer (EIDYES / EIDNO) to itself. If the answer is YES, then the current state will be changed to state 10 and the actions AcSELECT and AcMODE_SELECT will be processed. AcSELECT has to change the data to show that it is selected (e.g. change the color). AcMODE_SELECT causes a change in a special selection mode (for state machines) so that mitk::GlobalInteraction will favour this state machine. If the answer is NO, the current state will be changed to state 1 and actions AcDESELECT, that needs to deselect (change color) the data, and AcMODE_DESELECT is executed. AcMODE_DESELECT sets the mode of this state machine to deselected, so it will not be favoured by mitk::GlobalInteraction. AcCHECKELEMENT. Furthermore we have several transitions, that don't leave the state 10 and wait for arrow keys (up, down, shift+up, shift+down, left, right). They all lead to action AcMove which will implement the movement of the surface in 3D. Within the transitions three parameters define a movement vector that can be read within the implementation and used for the direction of movement. Several parameter types are supported. See mitkStateMachineFactory.cpp for supported types (BOOL_PARAMETER, INT_PARAMETER, FLOAT_PARAMETER, DOUBLE_PARAMETER, STRING_PARAMETER).Note, that the state id's need to be unique within the scope (state machine) but don't need to be continuous.
Now we have a definition of states, transitions and actions, that describe the interaction of selecting a surface, highlighting the selected surface and moving the surface according to arrow keys. To later change the interaction states can be inserted that check for different conditions (e.g. if a surface may not be moved: use data node properties as a flag). To change the keys, the EVENT_ID's will have to be adapted. Furthermore, the parameters can be used for a change. Because the file StateMachine.xml is loaded during runtime the interaction will change without a recompile of the application. Note, if the application fails to read StateMachine.xml, the interaction will not be possible and a error warning will be displayed.
So now we take a look what needs to be implemented within the new interactor:
Add includes:
#include <mitkInteractor.h>
We derive the new interactor from class Interactor and add some macros for convenience:
  class MITK_CORE_EXPORT MoveSurfaceInteractor : public Interactor
  {
  public:
    mitkClassMacro(MoveSurfaceInteractor, Interactor);
    mitkNewMacro2Param(Self, const char*, DataNode*);
The next method is called by mitk::GlobalInteraction and returns a value between 0 and 1 that represents how good a given event can be handled in the current state of the interactor. Superclass mitk::Interactor already tries to answer this question as good as possible by comparing the picked 3D world position stored within mitk::StateEvent to the center of the data bounding box, but this answer always needs to be adjusted to the corresponding data. In case of a point set the distance to the closest point can be used to rate how good this event can be handled and in case of a mitk::Surface IsInside(...) could be used. Furthermore if the data was picked and is currently selected, a higher value can be returned. Just take care, that your interactor answers CanHandleEvent(..) right and it will get the event! But also be fair to other interactors or your interactor will get all events! For this example we use the implementation that is given by mitk::Interactor, so we don't derive it here.
    //virtual float CanHandleEvent(StateEvent const* stateEvent) const;
    //used from mitkInteractor
The following method is used for the case when someone sets a new data to the corresponding data node. Here reinitialization of this interactor can be done. Note that this method is not called if the data gets modified (points moved / added / removed). Here we don't need the method, so we neglect it.
//virtual void DataChanged(){};
Default constructor and destructor specified as protected to fulfill SmartPointer conventions.
  protected:
    MoveSurfaceInteractor(const char * type, DataNode* dataNode);

    virtual ~MoveSurfaceInteractor();
This is followed by one of the most important methods which is implemented in the body and thus will be explained later:
virtual bool ExecuteAction( Action* action, mitk::StateEvent const* stateEvent );
See mitkMoveSurfaceInteractor.h for whole header definition.
Now we come to the implementation within mitkMoveSurfaceInteractor.cpp and after includes we begin with constructor and destructor. Nothing special here! *boring*
//## Default Constructor
mitk::MoveSurfaceInteractor
::MoveSurfaceInteractor(const char * type, DataNode* dataNode)
:Interactor(type, dataNode)
{
}

mitk::MoveSurfaceInteractor::~MoveSurfaceInteractor()
{
}
Remember, that events, that were sent to this interactor got handled within StateMachine::HandleEvent(...) according to the current state specified by the state machine pattern. If an appropriate transition is defined within the current state that waits for this event, a state change is performed. Also, all actions specified within the transition are processed by sending the action to the method ExecuteAction(Action* action, mitk::StateEvent const* stateEvent). And here we need to take care, that the actions are transformed to operations, that contain all necessary parameters so they can be sent to the data. The method ExecuteOperation(...) from the data object then changes the data accordingly.
bool mitk::MoveSurfaceInteractor::ExecuteAction( Action* action, mitk::StateEvent const* stateEvent )
{
  bool ok = false;

  /*Each case must watch the type of the event!*/
  switch (action->GetActionId())
  {
  case AcDONOTHING:
    ok = true;
    break;
  case AcCHECKELEMENT:
    /*
    * picking: Answer the question if the given position within stateEvent is close enough to select an object
    * send yes if close enough and no if not picked
    */
    {
      mitk::DisplayPositionEvent const *posEvent = dynamic_cast <const mitk::DisplayPositionEvent *> (stateEvent->GetEvent());
      if (posEvent == NULL)
      {
        MITK_WARN<<"Wrong usage of mitkMoveSurfaceInteractor! Aborting interaction!\n";
        return false;
      }

      mitk::Point3D worldPoint = posEvent->GetWorldPosition();
      /* now we have a worldpoint. check if it is inside our object and select/deselect it accordingly */

      mitk::StateEvent* newStateEvent = NULL;
      const Geometry3D* geometry = GetData()->GetUpdatedTimeSlicedGeometry()->GetGeometry3D( m_TimeStep );
      if (geometry->IsInside(worldPoint))
        newStateEvent = new mitk::StateEvent(EIDYES, stateEvent->GetEvent());
      else
        newStateEvent = new mitk::StateEvent(EIDNO, stateEvent->GetEvent());

      /* write new state (selected/not selected) to the property */
      this->HandleEvent( newStateEvent );

    ok = true;
    break;
    }
  case AcSELECT:
    // select the data
    {
      mitk::BoolProperty::Pointer selected = dynamic_cast<mitk::BoolProperty*>(m_DataNode->GetProperty("selected"));
      if ( selected.IsNull() )
      {
        selected = mitk::BoolProperty::New();
        m_DataNode->GetPropertyList()->SetProperty("selected", selected);
      }

      mitk::ColorProperty::Pointer color = dynamic_cast<mitk::ColorProperty*>(m_DataNode->GetProperty("color"));
      if ( color.IsNull() )
      {
        color = mitk::ColorProperty::New();
        m_DataNode->GetPropertyList()->SetProperty("color", color);
      }

      selected->SetValue(true);
      color->SetColor(1.0, 1.0, 0.0);

      //update rendering
      mitk::RenderingManager::GetInstance()->RequestUpdateAll();

      ok = true;
      break;
    }
  case AcDESELECT:
    //deselect the data
    {
      mitk::BoolProperty::Pointer selected = dynamic_cast<mitk::BoolProperty*>(m_DataNode->GetProperty("selected"));
      if ( selected.IsNull() )
      {
        selected = mitk::BoolProperty::New();
        m_DataNode->GetPropertyList()->SetProperty("selected", selected);
      }

      mitk::ColorProperty::Pointer color = dynamic_cast<mitk::ColorProperty*>(m_DataNode->GetProperty("color"));
      if ( color.IsNull() )
      {
        color = mitk::ColorProperty::New();
        m_DataNode->GetPropertyList()->SetProperty("color", color);
      }

      selected = mitk::BoolProperty::New(false);
      color->SetColor(0.0, 0.0, 1.0);

      //update rendering
      mitk::RenderingManager::GetInstance()->RequestUpdateAll();

      ok = true;
      break;
    }
  case AcMOVE:
    {
      //modify Geometry from data as given in parameters or in event
      mitk::IntProperty* xP = dynamic_cast<mitk::IntProperty*>(action->GetProperty("DIRECTION_X"));
      mitk::IntProperty* yP = dynamic_cast<mitk::IntProperty*>(action->GetProperty("DIRECTION_Y"));
      mitk::IntProperty* zP = dynamic_cast<mitk::IntProperty*>(action->GetProperty("DIRECTION_Z"));
      if (xP == NULL || yP == NULL || zP == NULL)
      {
        MITK_WARN<<"No properties returned\n!";
        return false;
      }
      mitk::Vector3D movementVector;
      movementVector.SetElement(0, (float) xP->GetValue());
      movementVector.SetElement(1, (float) yP->GetValue());
      movementVector.SetElement(2, (float) zP->GetValue());

      //checking corresponding Data; has to be a surface or a subclass
      mitk::Surface* surface = dynamic_cast<mitk::Surface*>(m_DataNode->GetData());
      if ( surface == NULL )
      {
        MITK_WARN<<"MoveSurfaceInteractor got wrong type of data! Aborting interaction!\n";
        return false;
      }
      Geometry3D* geometry = surface->GetUpdatedTimeSlicedGeometry()->GetGeometry3D( m_TimeStep );
      geometry->Translate(movementVector);

      // indicate modification of data tree node
      m_DataNode->Modified();

      //update rendering
      mitk::RenderingManager::GetInstance()->RequestUpdateAll();

      ok = true;
      break;
    }

  default:
    return Superclass::ExecuteAction( action, stateEvent );
  }

  return ok;
}
Likewise to maintain readable code and to not implement too large methods, the case statements within ExecuteAction(...) can be divided into several methods that are connected to the method by using the CONNECT_ACTION macro. See doxygen documentation on mitk::StateMachine for an example.
To add the newly written class to our project, we add it to the corresponding files.cmake.
Furthermore we take care of instantiating the interactor and setting its instance to the dedicated DataNode.
See Step10.cpp for adding the interactor to the interaction controller called mitk::GlobalInteraction and test Step10.cpp to see what the new interactor does.
    // create interactor
    // use it with up, down (->z direction), left and right (x-direction) arrow keys. Also hold Shift to translate in y direction.
    // see state machine pattern SelectAndMoveObjectWithArrowKeys in file StateMachine.xml for definition of interaction or use the StatemachineEditor.
    mitk::MoveSurfaceInteractor::Pointer surfaceInteractor =
      mitk::MoveSurfaceInteractor::New("SelectAndMoveObjectWithArrowKeys",node);

    //activate interactor at interaction controller:
    mitk::GlobalInteraction::GetInstance()->AddInteractor(surfaceInteractor);
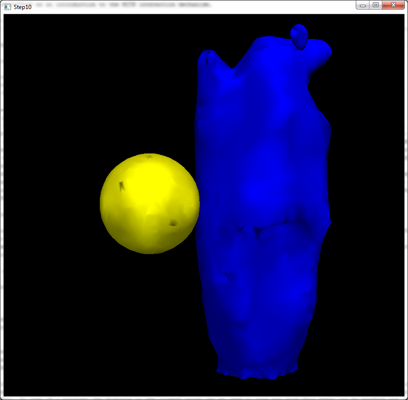
The implementation of Step10 is equal to Step1 except of loading two or more STL files, displaying the scene in 3D. To see what mitk::MoveSurfaceInteractor does, start Step10 with the command arguments and click onto one of the displayed surfaces. It turns yellow. If it doesn't, it is probably inside another surface. Then use arrow keys (+shift key) to move the surface. Click onto the other surface to deselect the first surface and once more to select the other surface. Now use arrow keys to move the second surface.
Have fun with creating your own interaction and please think about a contribution to MITK!
If you meet any difficulties during this step, don't hesitate to ask on the MITK mailing list mitk-users@lists.sourceforge.net! People there are kind and will try to help you.
 1.7.2
1.7.2

