As in the previous step one or more data sets (many images, surface and other formats) may be loaded. The difference is that they are displayed in a 3D view. The QmitkRenderWindow is now used for displaying a 3D view, by setting the used mapper-slot to Standard3D. Since volume-rendering is a (rather) slow procedure, the default is that images are not displayed in the 3D view.
In Step 3a the default is kept whereas in Step 3b volume rendering is turned on.
As in the previous step, to obtain the results the program has to be executed using the image file mitk/Core/Code/Testing/Data/Pic3D.pic.gz and the surface file mitk/Modules/MITKExt/Testing/Data/lungs.vtk.
Tell the renderer to create a 3D view:
  // Use it as a 3D view!
  renderWindow.GetRenderer()->SetMapperID(mitk::BaseRenderer::Standard3D);
The rest of the code remains unchanged.
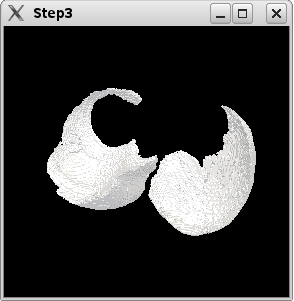
The picture above shows the result of the program when reading both the image and the surface file. As volume rendering is off the image is not visible.
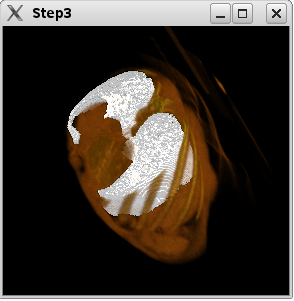
Volume Rendering is now turned on as shown in the picture above.
The property "volumerendering" has to be turned on on the node containing the image.// Check if the data is an image by dynamic_cast-ing the data // contained in the node. Warning: dynamic_cast's are rather slow, // do not use it too often! mitk::Image::Pointer image = dynamic_cast<mitk::Image*>(node->GetData()); if(image.IsNotNull()) { // Set the property "volumerendering" to the Boolean value "true" node->SetProperty("volumerendering", mitk::BoolProperty::New(true));
 1.7.2
1.7.2

